
How to remove the head of a Williams System 11 pinball machine
There are two types of System 11 games. Early models (like Pin*Bot and Road Kings) are straightforward. The backbox folds down on hinges, the removal process is similar to older Williams games (System 6 to 9), which is explained below.
System11 games with an interconnect board
Starting with Banzai Run, Williams introduced an 'interconnect board': a small PCB located at the bottom of the backbox with numerous connector pins. Most wires from the cabinet and backbox connect to this board. However, a few wires still connect directly to other PCBs. If you're working with this type of game, be sure to label each connector!
These games (except Banzai Run) typically feature the newer cabinet style, similar to WPC games.
When reassembling, don’t just plug in the first connector you find. Think carefully about the order. Begin with the wires that connect to the boards at the top of the backbox, and save the lower ones for last. This prevents tangling or having to remove wires to route others behind them.
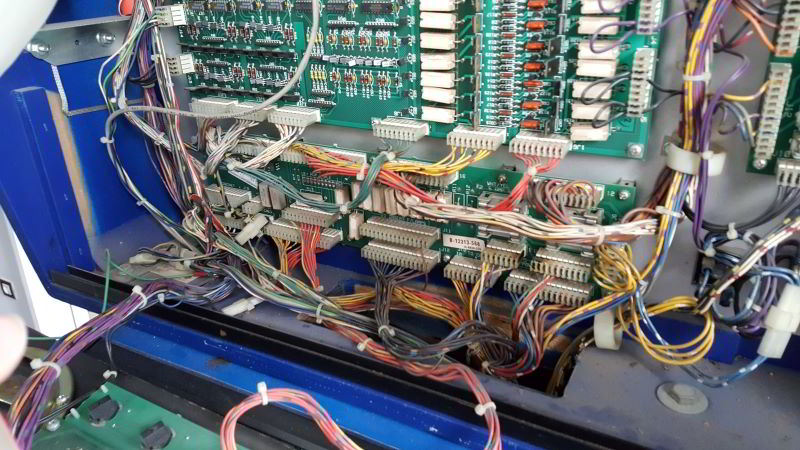
The interconnect board on a Black Knight 2000 pinball machine. Most wires that go into the lower cabinet can be disconnected from the long small board in the bottom of the backbox.
Disconnecting the backbox wires on the older style System11 pinball machine
Note: This is only a guide. I am not responsible if something goes wrong! Also, be cautious when disconnecting cables as they can easily get caught behind components (like ramps on the playfield). Gather all cables and place them somewhere out of the way. For example, when lifting the playfield out of the cabinet, try placing the cables on the playfield or already outside the cabinet, on the side where you plan to move the playfield. You don’t want to be holding the playfield in mid-air and realize a cable is still connected or stuck!
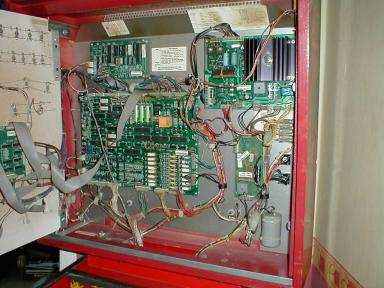
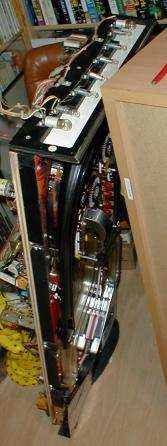
Here’s an image of the backbox. All those connectors look overwhelming, don’t they? Fortunately, the engineers at Williams devised a smarter way to remove the backbox and playfield. So don’t worry too much about all those connectors (I wish they had been that clever when designing WPC games!).
Remove the pinballs from the game! (Road Kings uses two pinballs.) Lift the playfield about one-third of the way up so you can see the back of the cabinet.
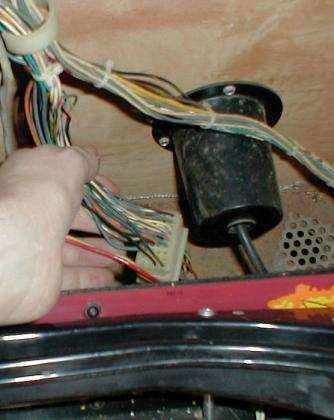
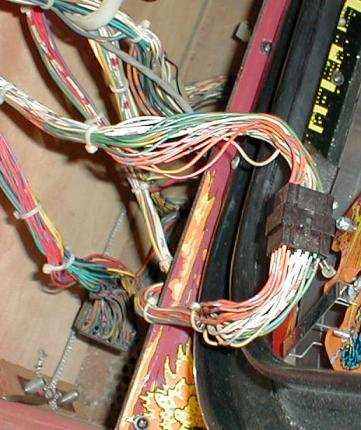
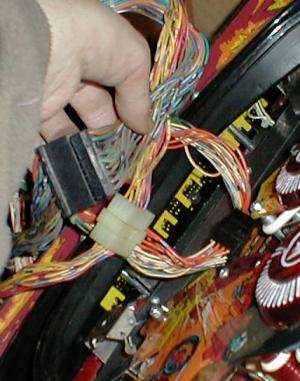
Gently pull on the cables running downward. You’ll notice they all have connectors!
Some connectors are located in the wiring loom inside the cabinet near the transformer. You can disconnect wires here instead of in the backbox..
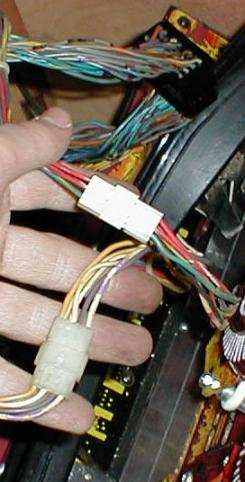
Unplug all connectors.
You could label them, but it’s not strictly necessary since they differ in color and size. Note that in earlier Williams games (System 6 to 9), some connectors have identical layouts and can be swapped. Worse, they were sometimes assembled incorrectly, requiring a white connector to fit into a black one. So when reassembling an older game, always double-check that the wire colors match on each connector.
There aren’t many connectors, and if you verify the wire colors, you should be able to reconnect everything correctly.
Of course it couldn't be as easy as this, there has to be one exception. :-(
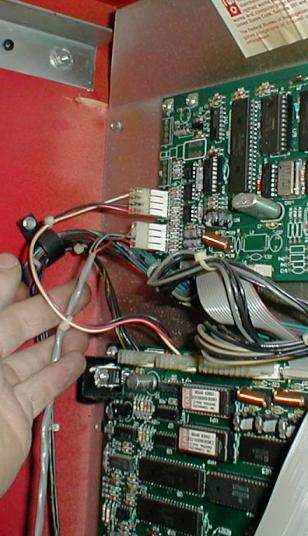
Of course, there’s one exception. A grey cable must be disconnected from the top left corner of the backbox. On older games, the sound board is on the right side. Just unplug it and drop the cable into the cabinet.
Note: In the pictures, I forgot to show the grey metal ground wire. You also need to disconnect this (located at the bottom of the backbox). Don’t forget to reconnect it during reassembly!
Removing the Backbox
Now you are able to remove the backbox. Fold down the backbox. You may need to remove two large bolts at the bottom of the backbox that secure it to the cabinet (mine were missing, which caused the head to shake during gameplay). Also remove two screws at the back of the machine (located at the ends of the metal plates that stick out).

Pull all cables through the hole into the cabinet. Remove the four screws (marked with blue arrows) to detach the backbox. Be careful—it may slide down! It’s best to have another person help you move the backbox safely.
Removing the Playfield
Now you can lift the playfield out. Check that all disconnected cables are free and not caught on anything. You’ll likely need another person, one on each side of the cabinet. Lift the playfield straight up to remove it out of the lower cabinet.
Tip: On Road Kings, be cautious with the row of light bulbs at the back of the playfield. They’re easy to bend, which can cause shorts (as I discovered!).
Now you’re left with an empty cabinet. It’s not very heavy, so you can move it on your own. You can also remove the legs and move the lower cabinet using a dolly.
Reassembly
Assembling is just the reverse procedure.
- Place the cabinet where you want it and attach the legs.
- Insert the playfield, ensuring it aligns perfectly with the hinge. It may be easier to insert the playfield when the legs are still removed, as you don't have to lift it too high then.
- Place the backbox on top of the cabinet.
- Secure the backbox with the four screws.
- Route the backbox cables through the hole into the cabinet. The grey cable should go up into the backbox from the lower cabinet.
- Lift the backbox upright and secure it with the large bolts and two rear screws.
- Reconnect all cables at the end of the cabinet going to the backbox.
- Don’t forget to reconnect the grey cable inside the backbox.
- Double-check that no cables are missing!
- Insert the pinballs, replace the playfield glass, and you’re done!
If you're looking for pinball parts, then check out Pinballshop.nl (affiliate link).