
How to install an Insider Connected kit in a Stern Pro pinball Machine
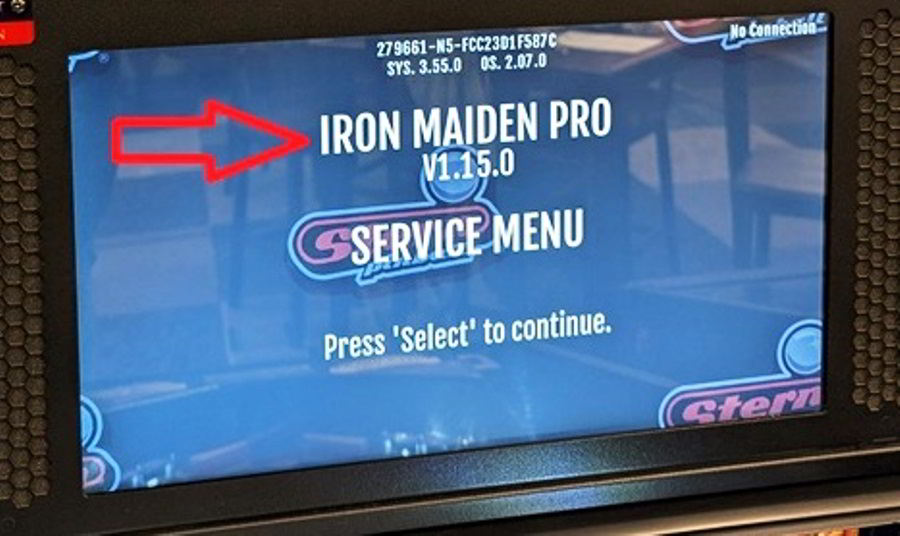
This article describes the installation process of an Insider Connected kit in a Stern Pro pinball machines. The installation guide is slightly different for the Premium and Limited Edition models, as these have a metal apron and different decal configuration. The Iron Maiden Pro machine where this kit is installed in, has a plastic apron.
The Insider Connected kit connects your machine to the internet and allows players to scan their Stern IC Profile QR code. During gameplay they can earn virtual awards and follow up their progress online.
Installation guide
Before you start: Verify your machine has the latest software version and update the machine to the latest software revision. The version number installed on your machine is displayed at startup. At https://sternpinball.com/support/game-code/ you can find the latest software revisions for each of their machines. All Stern pinball machines that support the Stern IC kit and were produced before it became available, have received a software update to supports the IC kit. If a newer version is available online, then follow this article on how to upgrade the software on a Stern Spike 2 machine.
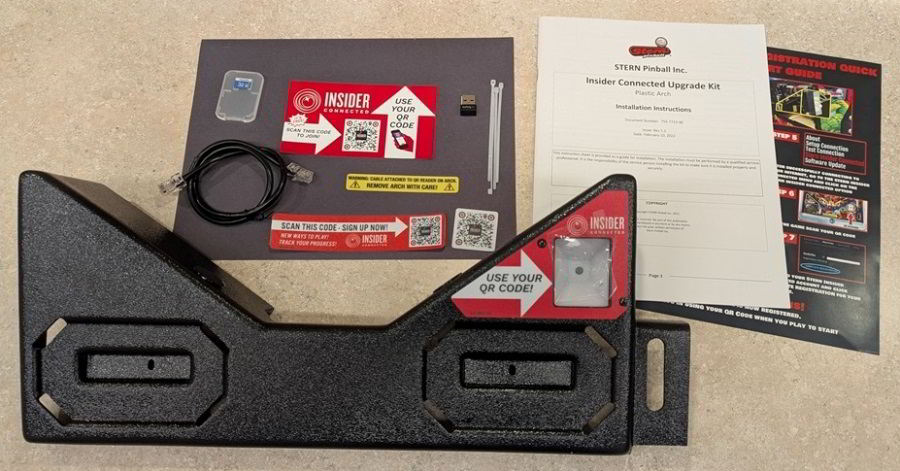
This is everything that comes in the kit: Apron with reader, WiFi adapter, 32GB microSD card, data cable, instructions, decals, zip-ties. The Stern IC module comes pre-installed in the apron.
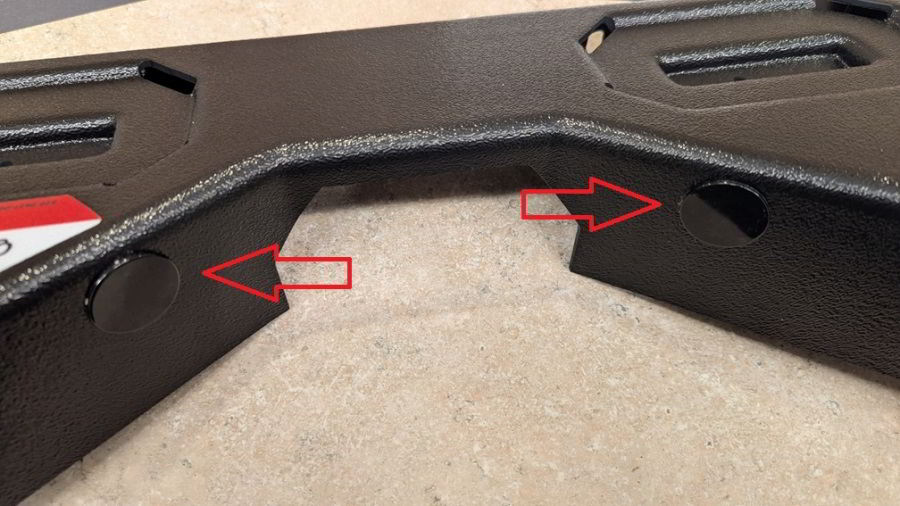
If your game has flipper lighting, these 2 plugs will need to be removed and the lighting disconnected from the old apron and installed in the new apron.
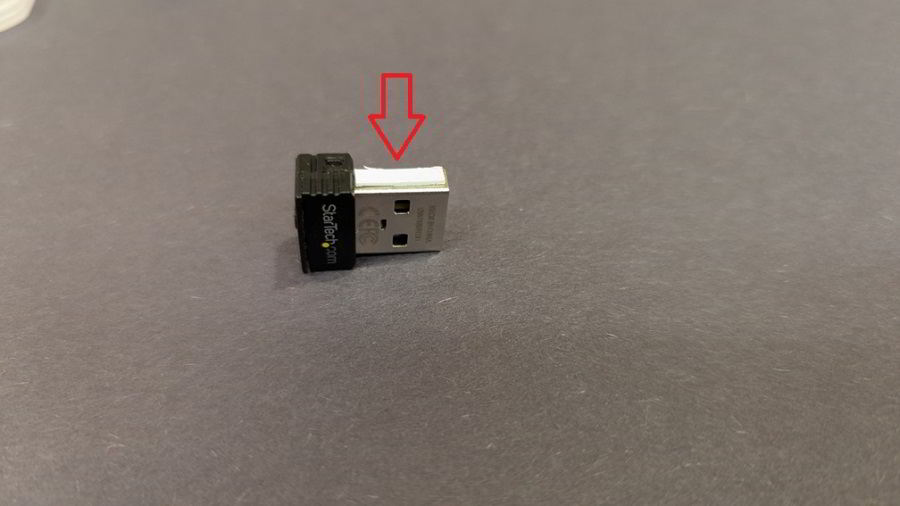
This is the WiFi adapter. VERY IMPORTANT! For some reason the adapter comes with this white padded sticker that MUST BE REMOVED! Otherwise it will get stuck inside the USB port and damage may result!
TURN THE GAME OFF !!
Remove glass and lockdown bar and the instruction and pricing cards to gain access to the mounting hardware.
Remove the pinballs from the playfield.
Raise the playfield up onto the service position.
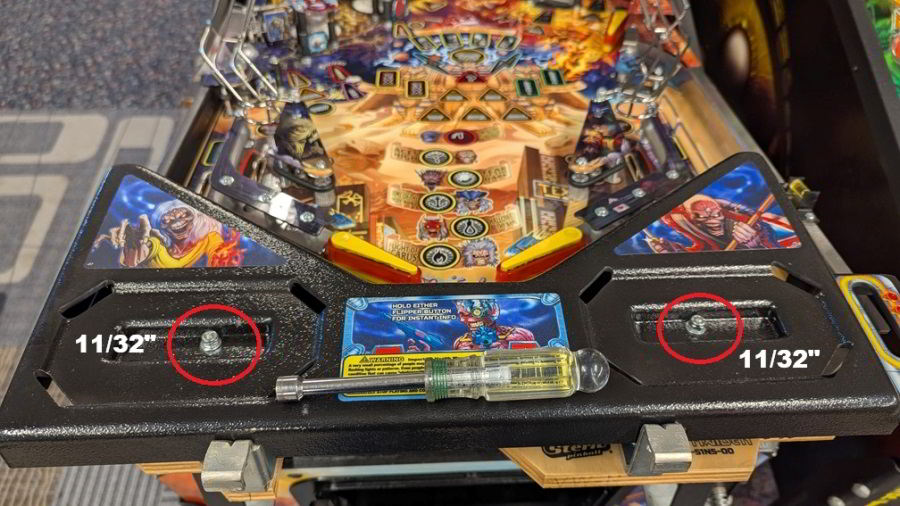
Use an 11/32" nut-driver to remove the 2 nuts and washers from the mounting posts.
Save the nuts and washers as they will be used to install the new apron.
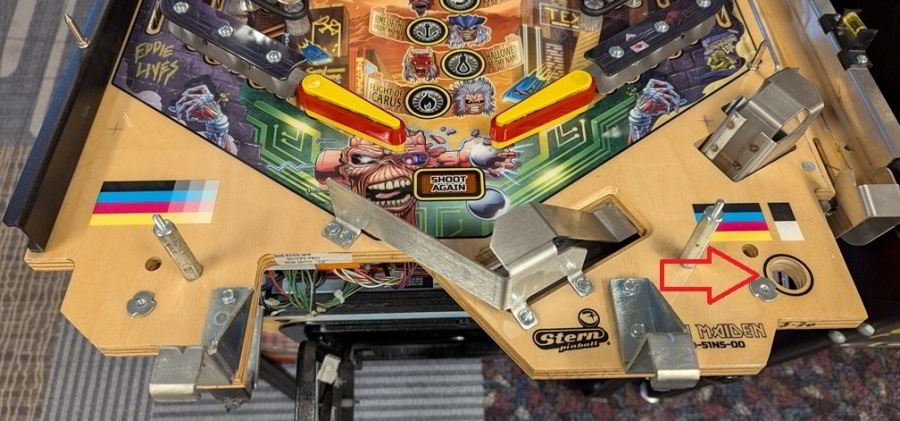
Apron removed. Note the hole where the data cable will be fed through. Now is a good time to clean under the apron!
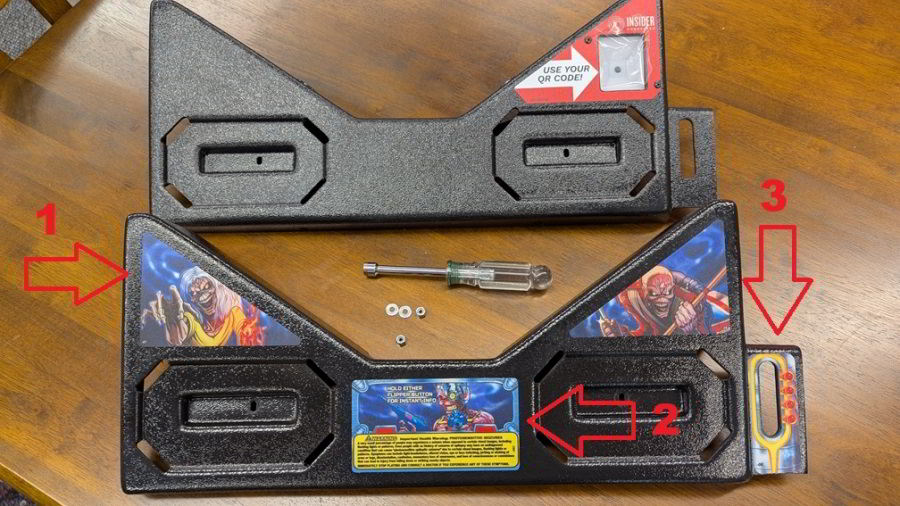
New apron on top. Old apron below. We are going to transfer these 3 decals from the old apron to the new.
If you're savvy, you could probably transfer the 4th decal that goes around the IC window, with some clever cutting.
Use a thin blade to get under the decal so as not to damage the edge. The decal peels right off and adheres to the new apron,
just don’t handle the sticky side too much.
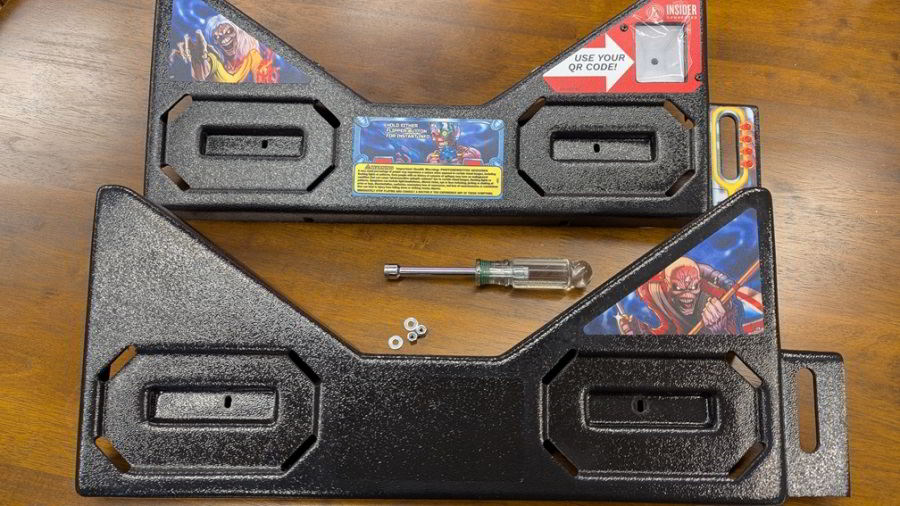
Decals transferred.
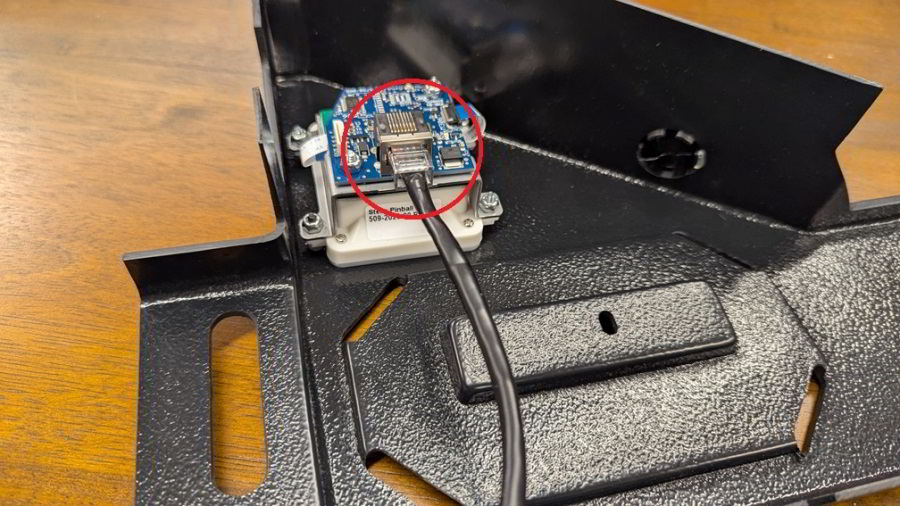
Connect the supplied data cable into the data port on the IC module. Note the orientation and it will snap into place with a click. Cable orientation does not matter.
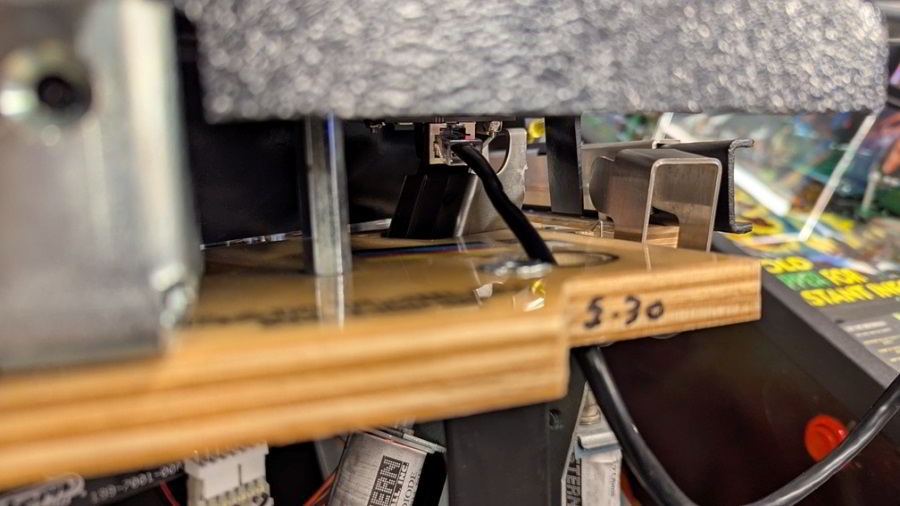
Route the other end of the data cable through the hole at the lower right of the playfield as you reinstall the apron on the mounting posts. Make sure the cable isn't in the way of the ball trough opening or the ball launch mechanism in the shooter lane.
Install the new apron. Reinstall washers and nuts from the old apron with an 11/32” nut driver.
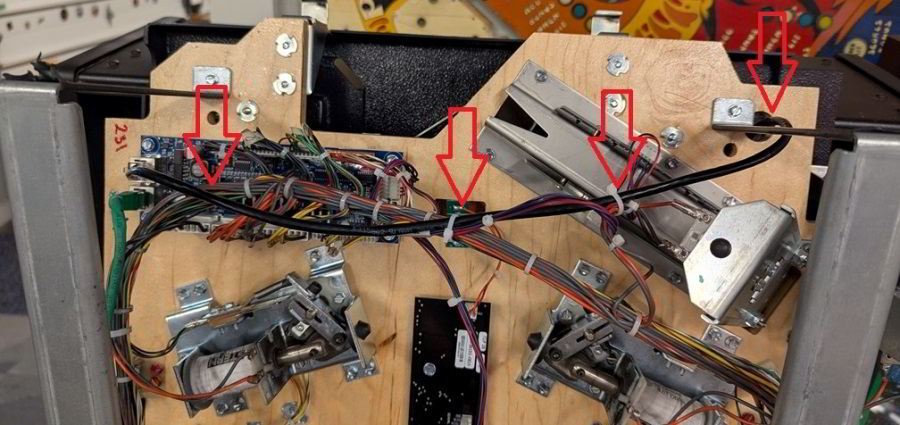
Multiple steps have been done here.
First lift the playfield to the fully up service position against the backbox, so you can vied the bottom of the playfield.
Plug the Stern IC cable (black in our case here) into the spare port of of Node 8 board until it clicks.
Node 8 board is located on the left side of the playfield.
It has a spare open data port. There will already be a data cable in one of the other ports.
Note the routing of the new data cable. Route it behind the service stands so it
doesn’t get pinched on the lockdown receiver. Zip-tie along the existing cable
harness making sure it’s out of the way of any moving mechanical assemblies, switches, optos, etc.
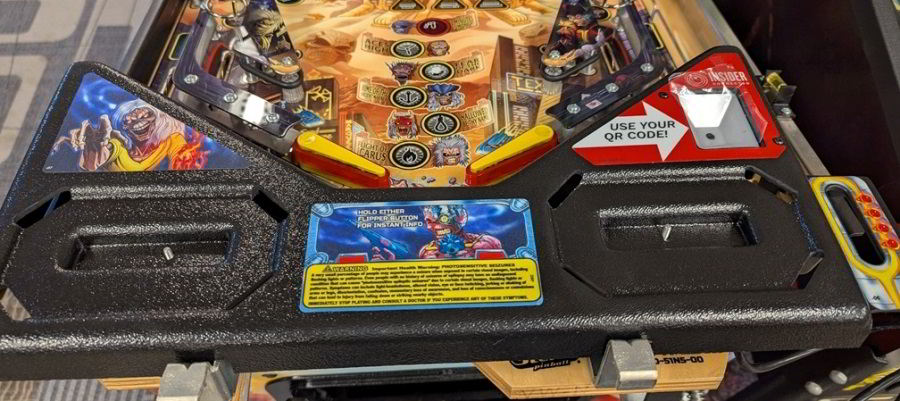
Once this is done, lower the playfield back in default position. Install the apron cards, pinballs and the playfield glass and close the coin door.
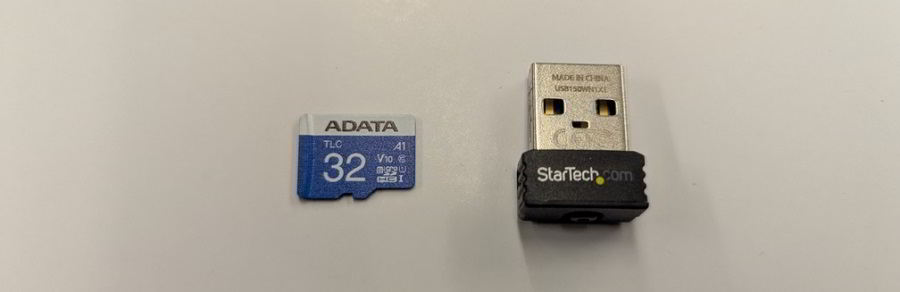
Now locate the included 32GB microSD card and WiFi adapter. There is no pre-installed data or files on the microSD card. It is preformatted FAT32 and the card is only used for storing and retrieving IC information.

Open the backbox by removing the backglass.
In the center is the Node 0 cpu board.
Add the microSD card to the port near the bottom of the Node 0 board.
Note the orientation of the microSD card and push it into the card slot until it clicks into place. Do not force the card in.
Install the WiFi adapter into either one of the available USB ports . It doesn't matter which one you use.
Turn the game on and wait for it to boot up. You may need to pull out the high voltage cutout switch near the coin door if your game has one.
You will see the display update the new node board associated with the IC reader.
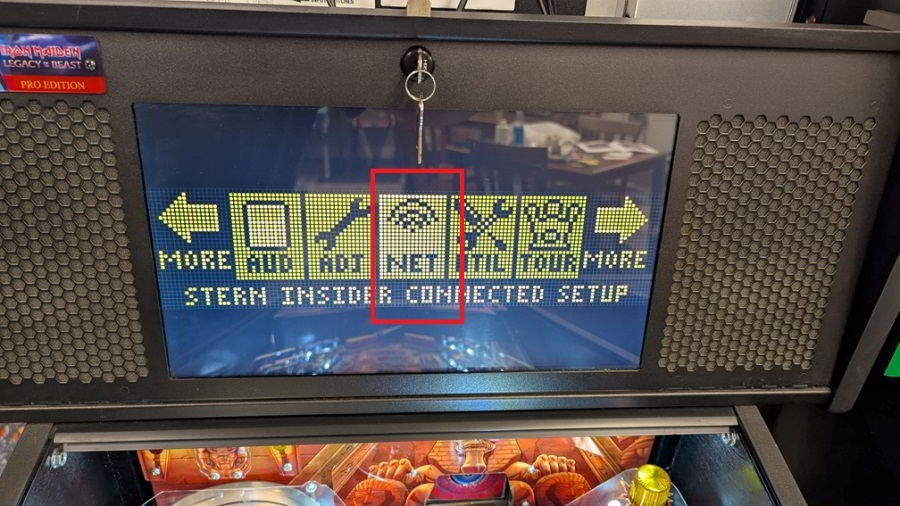
When the update is done, go into settings (use the coin door buttons) and scroll over to NET and press enter.
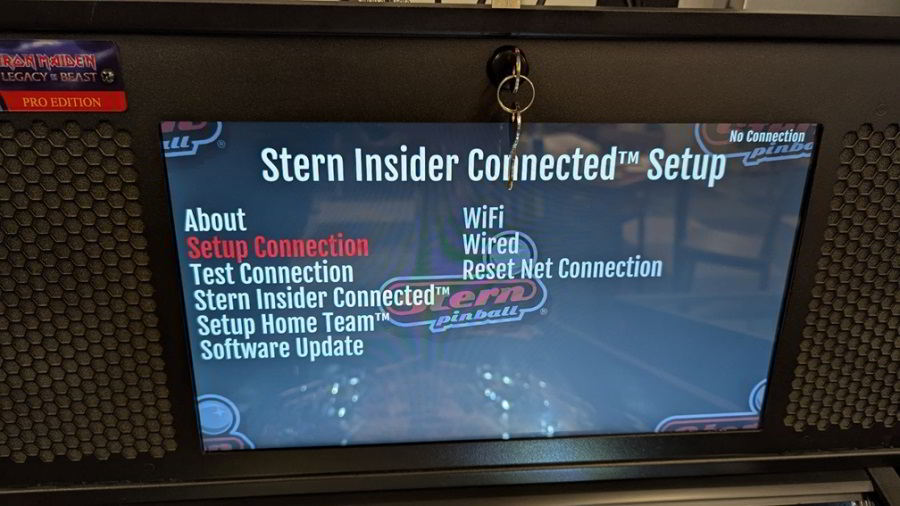
Scroll down to Setup Connection and press enter.
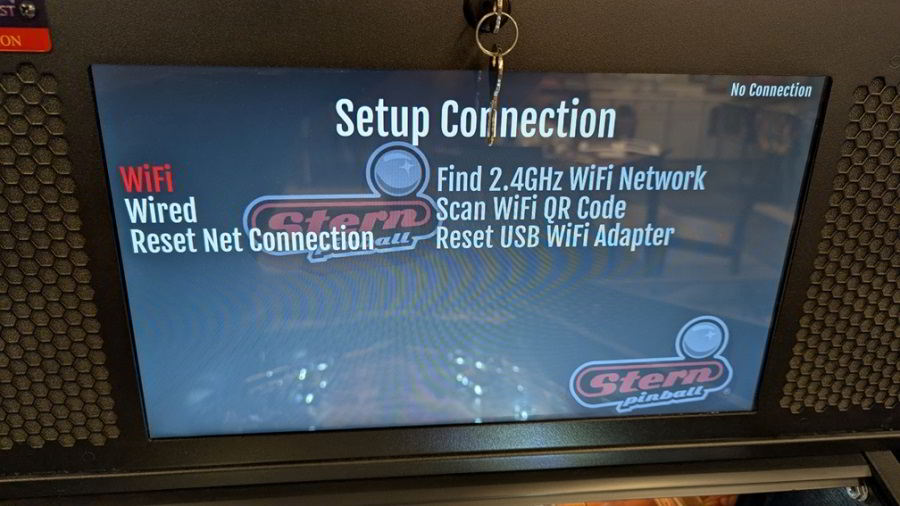
Scroll to WiFi and press enter. Note: The Stern IC system can only use 2.4GHz networks, so make sure you have a good strong 2.4GHz WiFi signal near the game.
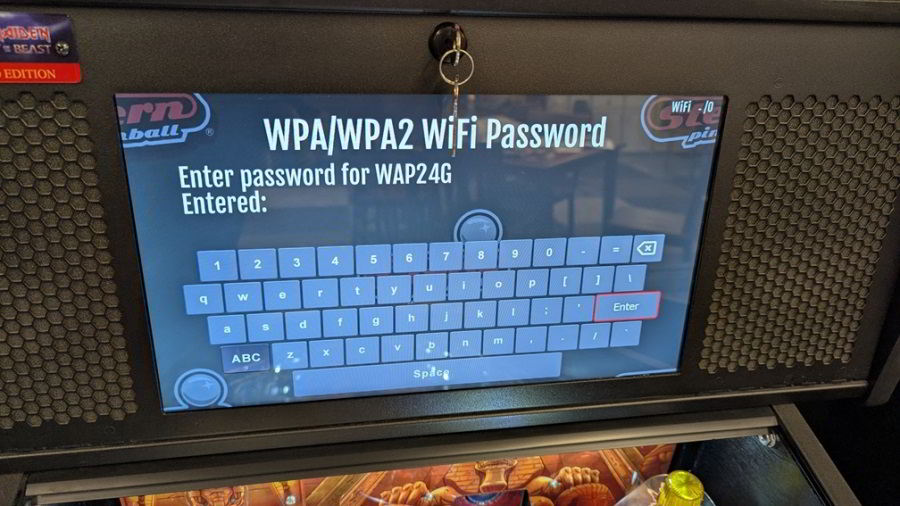
Select Find 2.4GHz Network and press enter. A list of available networks will be
displayed. Select the appropriate network and press enter.
Enter your password for the network you’ve selected and select ENTER on the screen’s keypad to continue and connect to the network.
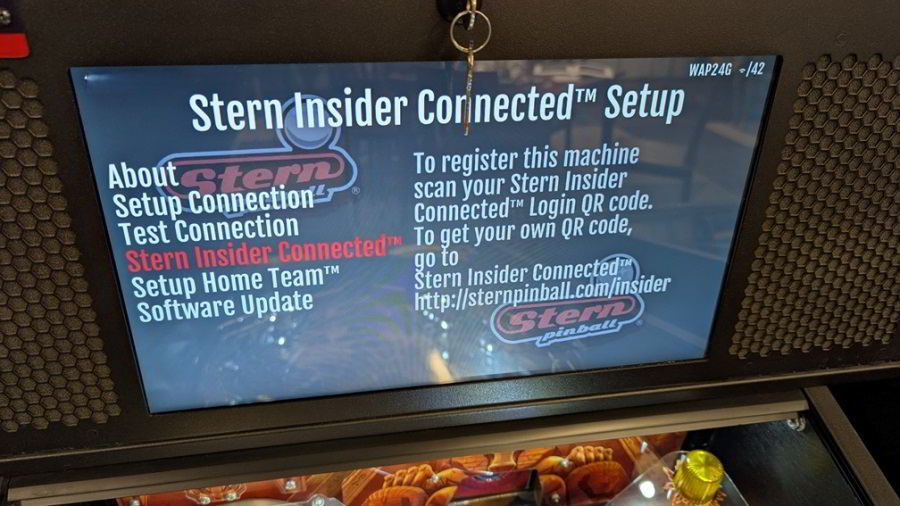
Once it connects, Go back and select Stern Insider Connected from the screen and press enter.
At this point you will need to have a Stern IC account. Go on your phone, log
into Stern Insider Connect and scan your unique Stern IC QR code on the reader
of the apron you just installed.
You should hear the connection tone once the
scan is successful.
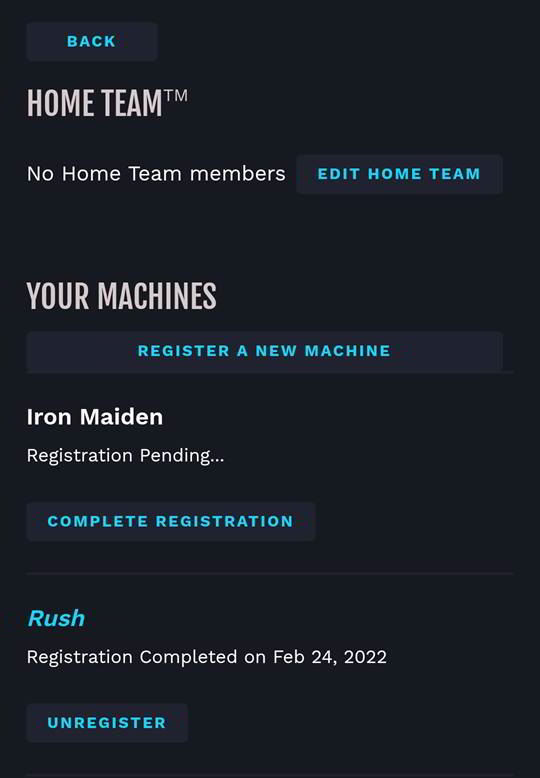
On your phone while logged into Stern Insider Connected application, go
to the three dots at the bottom right of the phone screen , then My Machines. You
should see a screen similar to this one on your phone. Any machines not
registered will show up as 'Complete Registration'. Click on the machine to
complete registration of the machine.
Btw registered machines will remain linked to your account. Before you sell the machine you must unregister it first. Until you do, the new owner will not be able to add the machine to their account.
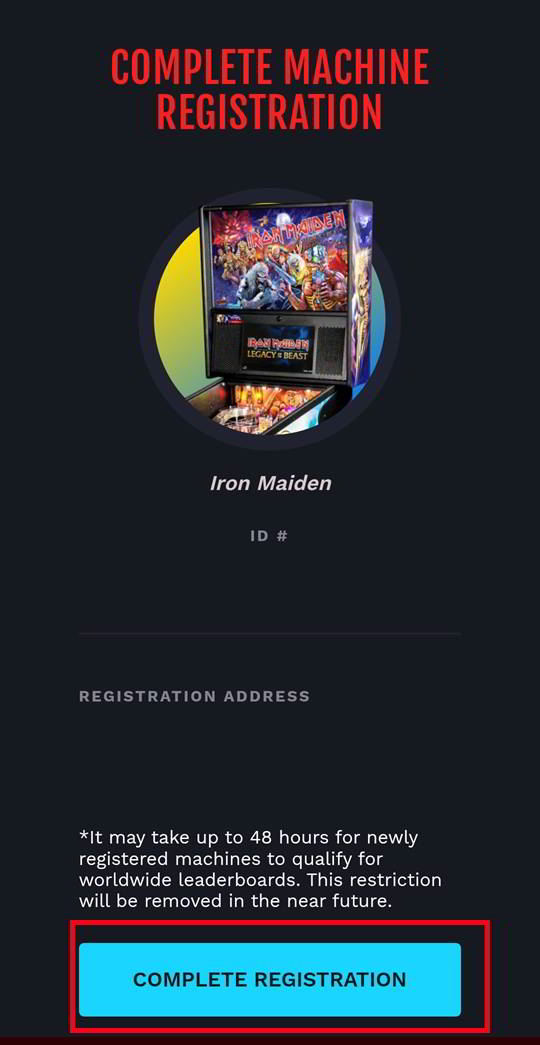
The Complete Machine Registration screen on your phone will be shown. Click on Complete Registration.
You will get an email from Stern and you will hear the pinball machine make a tone indicating it was registered successfully.
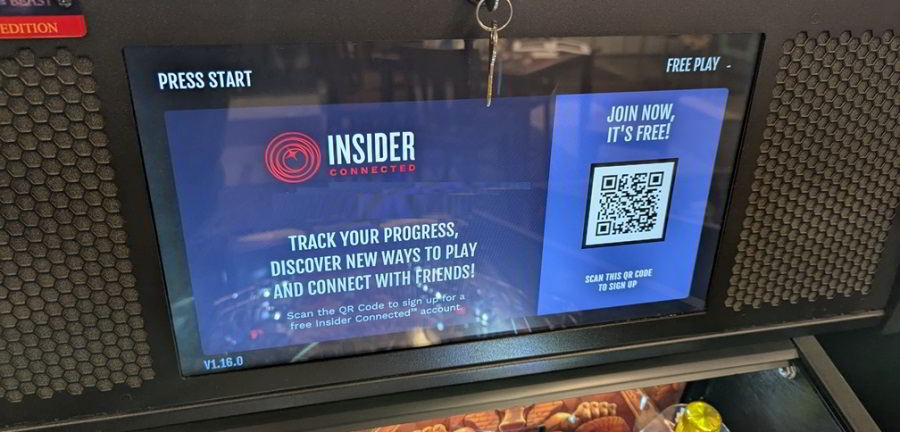
The Stern IC screens will now be seen on the game's display. Scan your Stern IC QR code and enjoy your first connected game and collect achievements!
Pictures and information by Mike S.
If you're looking for pinball parts, then check out Pinballshop.nl (affiliate link).