
Customising your Attack from Mars pinball machine with leds
This article documents my tests with installing leds in the saucers of the Attack From Mars (AFM) pinball machine.
As most people already know, UFOpinball.com sells a mini-saucer led kit. It gets great reviews, it's professionally done, but not cheap.
But as I'm a bit interested in electronics, I was thinking if it was possible to make something myself. Powering a few leds isn't that hard. My solution won't be as professional and impressive as UFOpinballs product and I don't want to compete with it, but I wanted to test some things anyway.
My first test is probably the cheapest and most simple led-kit solution possible. All it takes for each mini-saucer are 8 leds, one resistor and a bit of wire. For $2 you're set.
I just wanted to test how it looked if you installed the leds in the mini-saucers and hooked them up so they go off at the same time as the associated flasher.
Making this kit is simple:
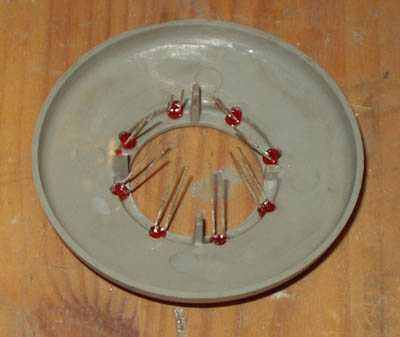
Buy eight 3mm leds and install them in the holes in the mini-saucer.
Although the holes are the right size, the leds don't always stay in position
(especially if you start to bend the wires),
so I used a small drop of superglue on each of them to secure them.
They all have to be in the same order, short leg always on the same side.
So the long leg of one led is next to the short leg of the led next to that side.

Then solder the legs to each other.
Note this one was just for testing and
I didn't want to cut legs, so I could remove and re-use the leds later in case
this experiment fails.
Normally you must cut them and put shrinktube around the legs.
Leave one pair open, that's where we will power them.
Flashers are powered by 20 volt and that's too much for leds, so we need to add a resistor. Using an online LED calculator I found I needed a 220 ohm 1/4 watt resistor (input: 20v - 2.0v, 20mA - 8 leds).
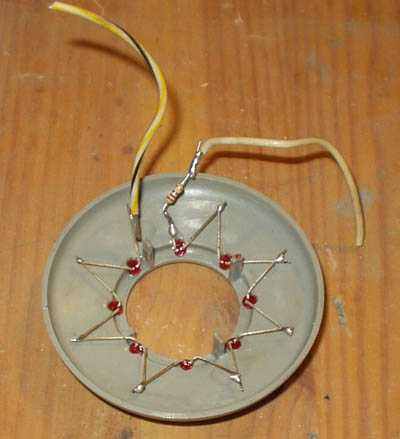
So here's this 220 ohm resistor soldered to the short leg and wires so I can
attach them at the flasher.
The wire with the resistor has to go to the negative
side of the flasher (check when you hook it up to the flasher, don't take the side
which has the red wire to it).
Note the wires are too thick ! But that was what I had within reach when I
was working on this first test..
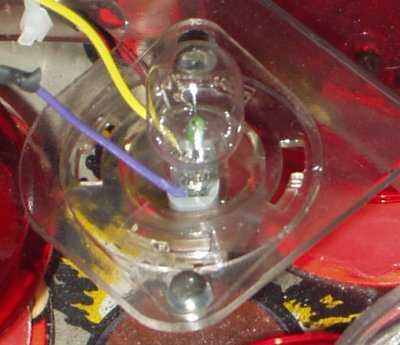
Here's everything hooked up. I removed the red flasher cap and the flasher light bulb,
and put the (stripped) ends of the wires in the metal parts the flasher plugs into.
Check + and - (resistor should not be at the red wire). Then I put the red cap back on
with the wires running between it and the flasher base. It didn't fit very well
as the wires are too thick. But I didn't want to make any permanent damage and e.g. start drilling holes.
Another solution is to use small alligator clips and connect the wires at the underside of the flasher base.
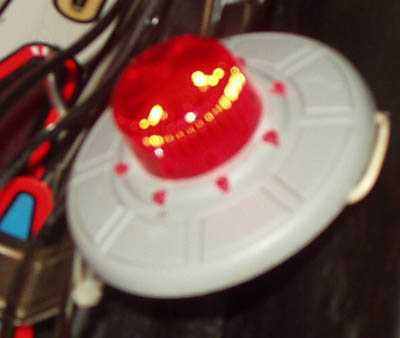
The result is a bit disappointing. In the dark the leds are not bright enough
compared to the flasher. It's even not a huge difference to a mini-saucer
that has no leds installed, as the red flasher cap is visible through the holes.
So this first test is a bit of a failure. The idea does work but the leds don't show up enough as the color isn't different enough from the red flasher.

Next test, this time with yellow leds. On picture it looks better, but in reality
the yellow color is also not bright enough compared to the red flasher cap.
It becomes more of an orange/red color. It's an improvement compared to the red leds
(which don't show at all) but they're still not distinct enough.
So I can conclude that hooking up leds to go off together with the associated flasher cap is not a good idea. It works but just is not worth the effort, the result is not spectacular enough.
Individually driven leds are the only way to go. A possibility to test is the led sequencer schematic from this site in a similar way as explained on pinballnews.com for a Revenge from Mars. This design lights up the leds after each other so it looks like the led circles the ufo.
Note the circuit only can handle one led on each output. The 4017 IC cannot handle much load on its output pins. Connecting multiple leds to each output (so you can light up a led on each of the 6 saucers at once) is not possible within this circuit. Therefor it needs to be extended with transistors. This is something I want to try in the future..
The UFOpinball.com product is similar, it drives each led individually, but has many more patterns programmed. So I advise this product if you want the best 'mod' for your Attack from Mars pinball machine available. I have only heard positive feedback about this.
Warning: there is a seller from Germany with similar led kits for
Attack From Mars and Revenge from Mars (they are for sale on ebay too).
He does have a nice product but has a very bad reputation !!
It seems once he gets your money you don't hear from him anymore. A lot of people lost money,
only a few actually received theirs but only after a long time and treatening with legal action.
If you're looking for pinball parts, then check out Pinballshop.nl (affiliate link).