How to replace the protective DMD plastic on WPC95
Over the years, I’ve often heard people say that replacing the clear plastic cover in front of the DMD on WPC-95 games is extremely difficult, or even impossible. I had never tried it myself, so I hadn’t looked into how challenging it really was.
The entire speaker grill assembly is hard to find and quite expensive, so fixing a scratch in the clear plexi can turn into a costly job. Recently, an operator I know bought a Junk Yard machine with a damaged DMD cover, and I offered to take a look. Surely it couldn’t be that difficult, right?
There’s one tricky part that everyone who’s tried this and complained about it runs into: the plastic is held in place by metal rings pressed over black plastic knobs. You have to be extremely careful not to damage these knobs—they’re part of the front assembly. You can’t simply screw into the black plastic, as that would ruin it.
Additionally, you need to remove the metal rings without damaging them, or find replacements so you can secure the new protective cover properly.
So, is it really as impossible as people say online? Not at all, at least, that’s my experience. As mentioned, the hardest part is removing the metal rings without causing damage.
DO NOT CUT THE BLACK KNOBS! I’ve heard of people cutting off the tops to remove the metal washers, only to find they couldn’t secure the new plastic afterward. You absolutely need to keep those black knobs intact.
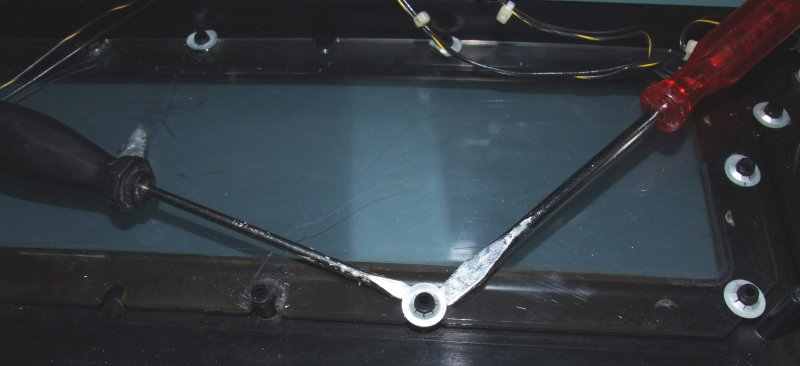
The trick to removing the metal washers is shown in the photo below: use two flathead screwdrivers and gently pry them upward. Try to keep the washers intact, but most importantly, avoid damaging the black plastic.

If the metal rings are too deformed once removed, you can flatten them again using pliers or a vise. Some rings were extremely difficult to remove, so I used side cutters to snip them. That made removal easier, and they could still be reused to hold the new plastic in place.
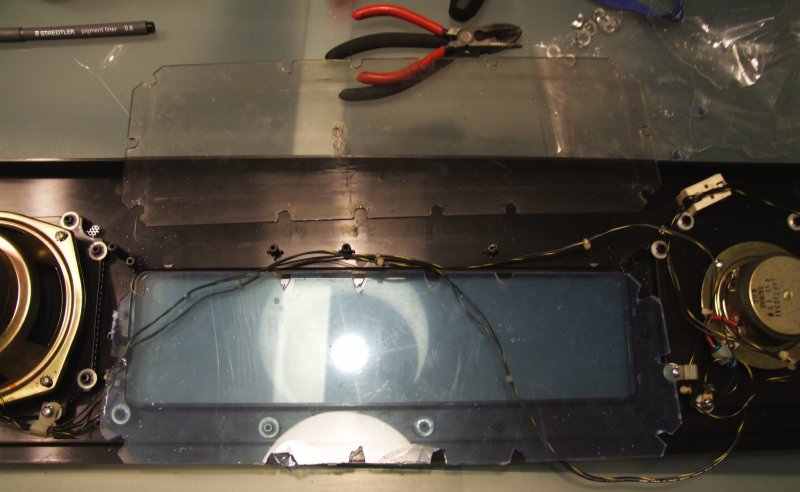
You don’t need to remove all the metal rings. You can leave one long row—either top or bottom—and slide the plastic out sideways. Don’t make the job harder than it needs to be. (In the photo below, I had already removed too many.)

Once enough metal washers are removed, the damaged plastic slides out. Trace its shape onto a new piece of plexi or Lexan and cut it out. Try to match the original size as closely as possible. Fortunately, the edges aren’t visible from the front, so they don’t need to be perfect. Just make sure it fits well and the holes for the metal rings aren’t too large.
Also, match the thickness of the original plastic. If the new plexi is too thick or too thin, it won’t fit properly. In the photo above, the old plastic is at the top, and the new one I cut out (with blue protective film still on) is at the bottom.
Update: new plastic covers for WPC, Sega and Stern games can be bought at Pinballshop.nl (affiliate link).

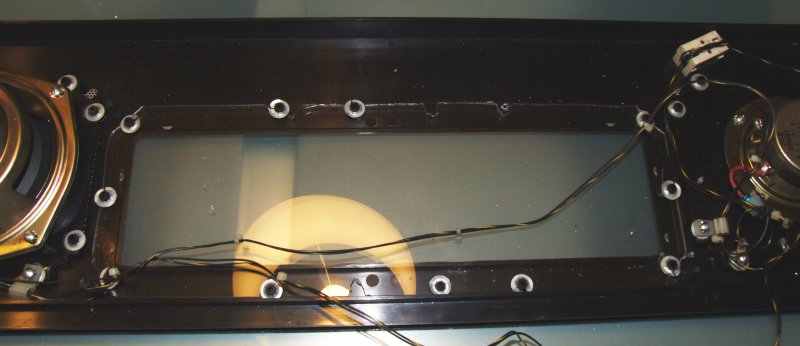
Next, install the new plastic cover and reattach the metal washers. Even the rings you had to cut (see photo, most of the top ones were cut) will still provide enough pressure to hold the plastic in place.
Whether these cut rings are strong enough depends on the machine’s usage. For home use, this method should be fine. The plastic will stay in place, and you can press on it quite firmly before it moves. Don’t worry, it won’t fall out when you move the game.
If you’re an operator and the game is going back on location, you probably don’t want to take any risks. I suggest securing any questionable metal washers with a hot glue gun. You could use a two-component epoxy, but that’s permanent. If you ever need to replace the plastic again, you’ll damage the black knobs.
With hot glue, the rings will be secured, and you can remove the glue later using heat without melting the plastic. That way, future repairs remain possible.

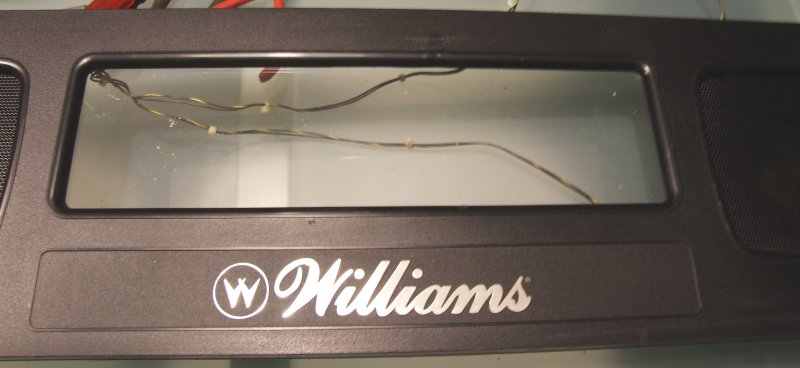
Here’s how the front looks now: a brand-new clear DMD protective plastic installed.
If you're looking for pinball parts, then check out Pinballshop.nl (affiliate link).
