
A while ago, we bought an old fridge and restored it so it would fit nicely in our gameroom. Here's a tutorial on how we did it, since many people are interested in restoring retro fridges, or simply want to give a plain white fridge (or other kitchen appliance like a freezer or dishwasher) a fresh look so it blends better with their kitchen decor.
When we installed a new bright red kitchen, we had our Smeg fridge professionally painted to match the color of our cabinets. It looked fantastic, the color match was perfect, and the clear coat made it resistant to scratches. However, the paint job cost more than buying a brand-new plain fridge!
So when we bought a retro fridge for our gameroom, we decided to repaint it ourselves. We weren’t aiming for perfection, it just needed to be affordable. Since the fridge would be decorated with decals and placed in a dimly lit room, a flawless finish wasn’t necessary.

So when we bought a retro fridge for our gameroom, we decided to repaint it ourselves. We weren’t aiming for perfection, it just needed to be affordable. Since the fridge would be decorated with decals and placed in a dimly lit room, a flawless finish wasn’t necessary.
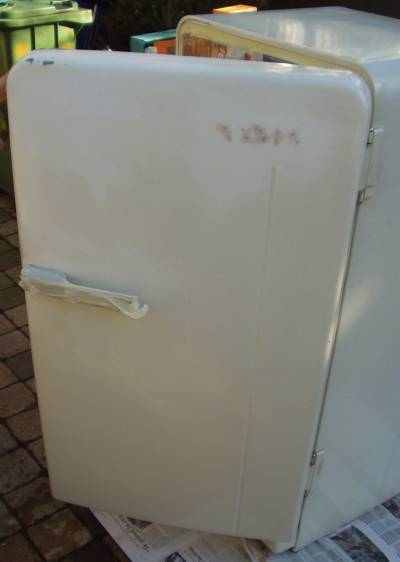
Here’s the fridge we bought. It’s a Bosch, probably manufactured in the late 1960s or early 1970s. The door isn’t completely flat, it’s rounded and features a cool chrome handle. That’s exactly what we were looking for in a retro fridge!
Since I’m not familiar with mechanical fridge repairs, we made sure it worked properly before buying. Don’t buy a fridge that doesn’t cool unless you know how to fix it! (Some old fridges can be repaired, but others are simply beyond saving.)
One tip: there’s a small switch that gets pressed when the door closes. On many old fridges, this part of the door is broken. If the switch doesn’t engage, the light stays on even when the door is closed. This heats up the fridge and causes it to run continuously. So if the seller says the fridge never shuts off, check the door switch!
Preparation before painting
Here’s the fridge again, already prepped for painting. A lot of work has been done at this point:
- Old decals were removed.
- The BOSCH logo was taken off, and dents and small holes were patched using automotive filler.
- The filler was allowed to dry and then sanded smooth.
- The entire fridge was sanded and cleaned.
Before repainting an old fridge or appliance, you must thoroughly clean the surface. I washed it to remove all dirt, then lightly sanded the old white paint with 120-grit sandpaper to reduce its shine. This helps the new paint adhere properly.
After sanding, it’s crucial to remove all dust. You can wash the surface and let it dry completely, or use synthetic thinner to clean it. Fill any holes, dents, or scratches with automotive filler, shape it roughly, let it dry, and then sand it very smooth. Start with 120-grit sandpaper and move to finer grits—up to 600 or even 1200 if you want a perfect finish.
You shouldn’t see any imperfections, scratches, or filler edges once you’re done. These will still be visible after painting. If you want a flawless paint job, remember: preparation is 80 percent of the work!

Once ready, tape off the rubber door seal and the interior to prevent overspray.
Spraypainting an old fridge
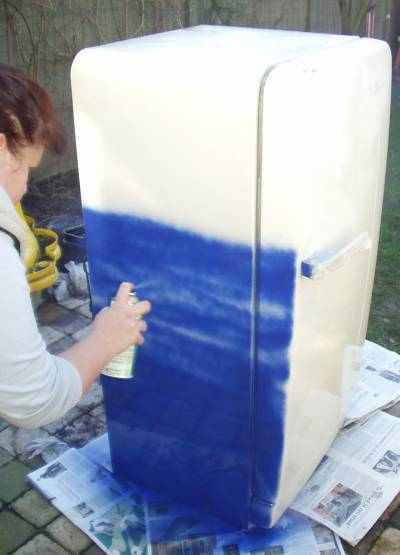
Now it’s time to paint! Many people make the mistake of not shaking spray cans long enough. If the instructions say to shake for 2 minutes, don’t settle for 30 seconds: follow the directions!
In the photo, the spray can is held a bit too close to the fridge, but due to wind, we had too much overspray otherwise. For a perfect finish, avoid painting in windy conditions and keep the spray can at the recommended distance to apply an even coat.

The first coat is done. It’s not perfect yet, you can still see some color variation. This is corrected with a second coat (applied within a few hours, check the spray can instructions).
Once the color looks right, you’ll want to make the surface smooth and shiny. Use car polish to smooth the paint after it has dried for a few days. This gives the fridge a glossy finish.
To protect the paint and enhance the shine, apply a clear coat using spray cans. Follow the same steps as before: degrease, spray, let it dry, and polish if needed. If you plan to clear coat, don’t polish the base paint, only polish the final clear coat.
Our Finished Fridge

Here’s our finished fridge! We wanted to turn it into a unique pinball-themed piece. Our first idea was to have it airbrushed, but airbrushing large surfaces like a fridge door is expensive, and not every airbrush artist is as skilled as they claim.
Instead, we had large decals printed. A friend used Photoshop to create a collage of pinball-related images, which we had digitally printed. Even the sides of the fridge feature decals: the sword from the Medieval Madness cabinet, with reflective pinballs from the Twilight Zone cabinet swirling around it.
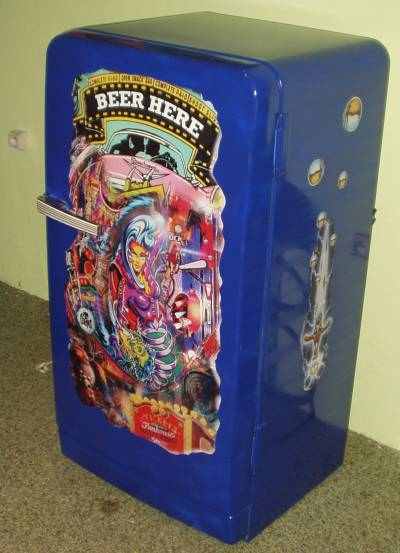
One final touch I’m considering is extending the lightning around the sword into the blue background of the fridge.
If you're looking for pinball parts, then check out Pinballshop.nl (affiliate link).