
Photographing pinball machine playfields
Pinball machine playfields are more difficult to photograph well than backglasses in my opinion. That is because they are three-dimentional. Apart from the problems I already discussed when photographing backglasses (lighting and reflections), depth of field (DOF) and composition are also very important to make a great photo.
Although difficult, playfields are the most interesting to photograph. Each photographer can be creative and
make his own composition. Everyone will put focus on something different, one person will prefer an overview shot
while another wants to put attention onto a very small detail in the artwork on a playfield.
The amount of light will also
make a huge difference to how the picture turns out. Some want to use bright lights and bring out all details in
the artwork on a playfield, but less light can also provide stunning pictures, capturing a special type of mood.
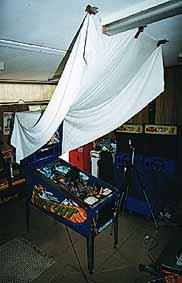
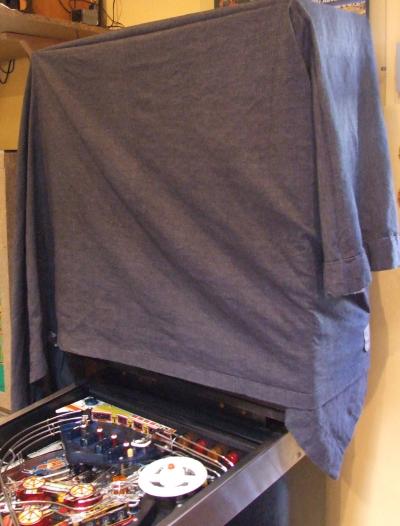
Make your own light tent to control reflections and reflect light onto the playfield. Just a sheet on top of
the backbox, taped to the ceiling.
Picture by Marco Rossignoli.
Another tip I received: use a white party-tent if you have one. Although a bit more work to assemble then this white sheet, it can also be used as a giant overhead softbox.
Complete playfields
One trick I was told (but haven't done myself) to take full playfield shots from above: remove the front legs of a pinball machine. This makes it much easier (and safer) to take photos of the complete playfield from above. It's also more easy to work around the machine: you don't have to climb a ladder, add lights very high on stands, ...
An advantage of removing the front legs is that you don't absolutely need a tripod for full playfield shots. Because of the playfields angle in relation to the camera (when you stand in front of the game), you can use your cameras flash for extra illumination.
As said before: always remove the playfield glass if you can (and put the lockdown bar back in position).
If you want to take a full machine picture, pay attention to the background.
Make it as uncluttered as possible. Move the machine into an empty corner of your gameroom.
Hang sheets from the ceiling to block view of everything and provide a background.
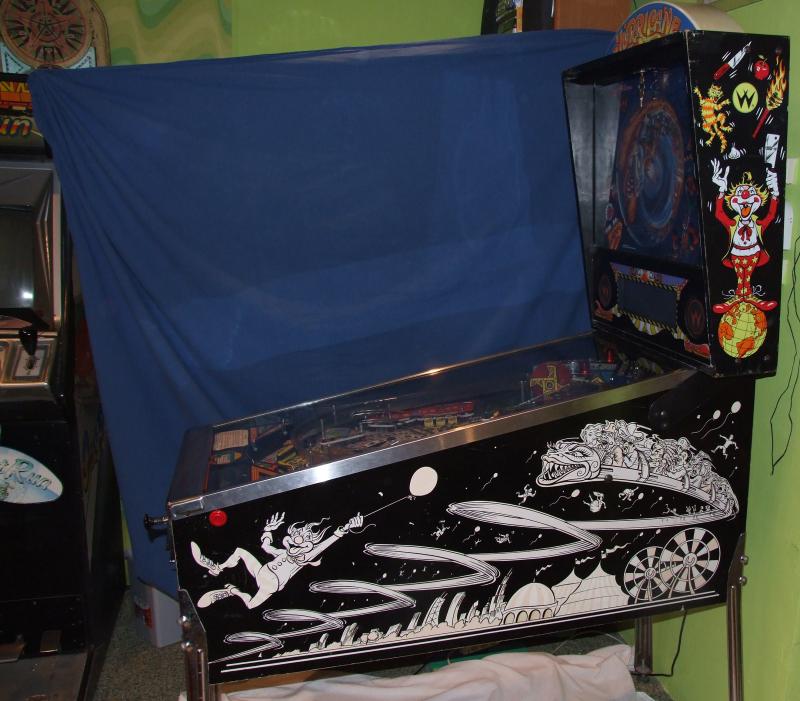
One sheet is a bit too small for full machine pictures. It's good enough for playfield closeups.
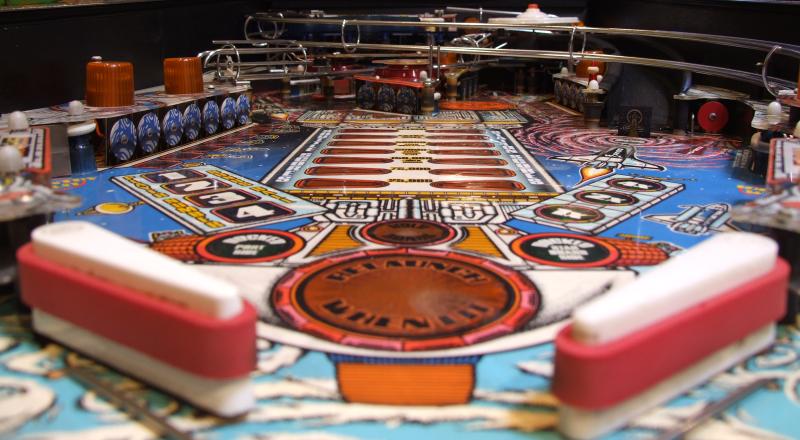
Low playfield shots
Taking pictures from above or behind the flippers, or anything at a mainly horizontal angle.
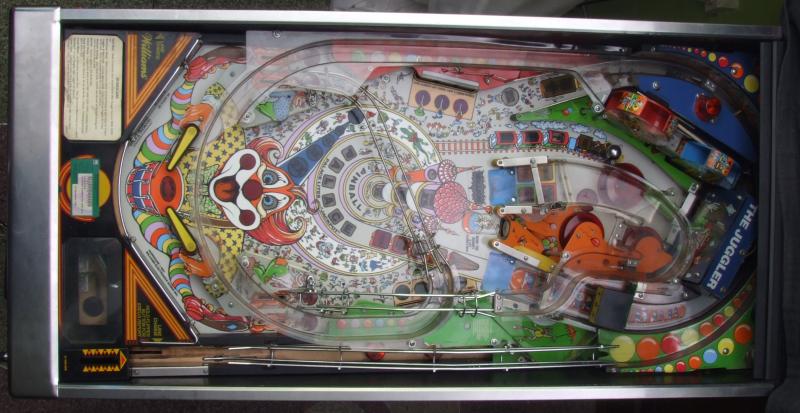
Remove the apron
Remove the apron of the game. If you want to make a complete playfield shot that includes the flippers,
but don't have a special wide-angle lens, remove the apron. This usually allows you to position the camera a bit lower
behind the flippers so you can include more of the playfield and flipper bats.
If this is necessary or not will also depend on the size of your camera. A small compact camera has its advantages here.
Remove the apron. If you want to bring your camera even lower towards the playfield, remove the metal parts underneath the apron where the pinballs are stored.
This is the best view I can get with my 28mm lens. For a real behind-the-flippers shot that shows the whole width of
the playfield including the outlanes, you really need a dslr camera with special wide-angle lens (around 20mm should do it).
Removing the apron at least allowed me to include more of the flippers, with the apron installed it was impossible
to show them completely as the camera must be positioned too high.
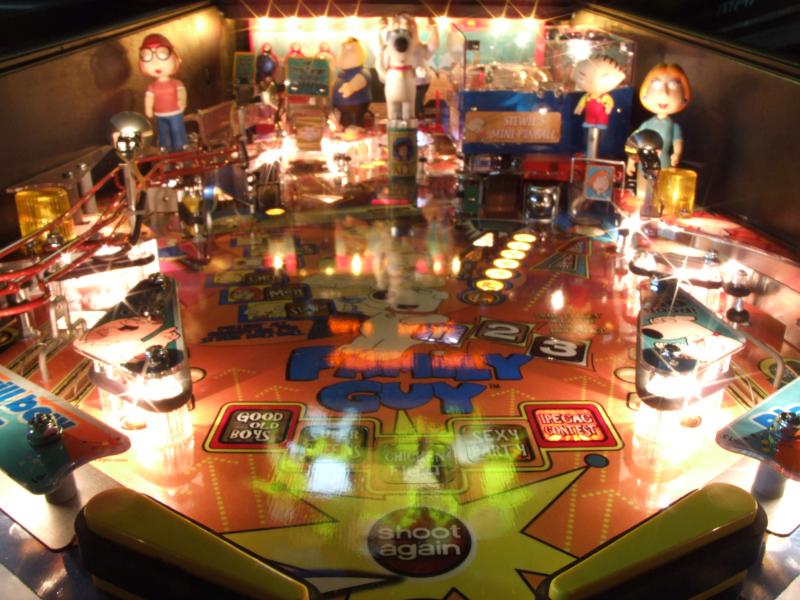
Cover the backbox
Always cover the backbox when you're taking full playfield shots from just above the playfield.
Put a dark cloth around the backbox, a piece of cardboard, whatever it takes.
The dot matrix screen and backglass illumination can be too bright compared to the playfield, causing a lot
of unwanted reflections.
I once went especially to a distributor to take pictures of his brand new Stern Spiderman and Family Guy.
Both had very shiny playfields, they reflected the backbox lights too well !
It's not funny coming home and noticing all of your playfield shots are useless because they reflect
backglass artwork and DMD text upside down !
Also note that almost every recent Stern pinball machine has a row of lights at the top of the panel in the
back of the playfield.
These will also cause bad reflections on the playfield when taking this type of shot (especially in a dark room..
in a well-lit environment you'll have this problem less). Pay attention to this and be prepared to cover these lightbulbs
if you have to.. or careful select your camera position so their reflections are less disturbing and hidden behind
playfield plastics and toys..
Camera settings
If you have a compact camera on which you cannot set exposure time manually, it's usually still possible to make
great shots of playfields that are not very bright lit. Check your cameras manual if you can adjust these settings:
ISO: keep it low, like 100. Do not set it to AUTO as the camera will usually try to raise the ISO high enough
to get a short exposure time, but this will introduce noise. You want to force it to use a long exposure time.
- Use the selftimer so you don't get movement from pressing the button.
- Always use a (mini) tripod or beanbag in combination with the selftimer..
- Use a 'natural light', 'nightshot' or similar setting. If your camera doesn't have those, try portrait or landscape
and see what result you like best..
- Experiment a lot.. just try several settings and see what you get. Write down what settings you have used.
Closeups photographs
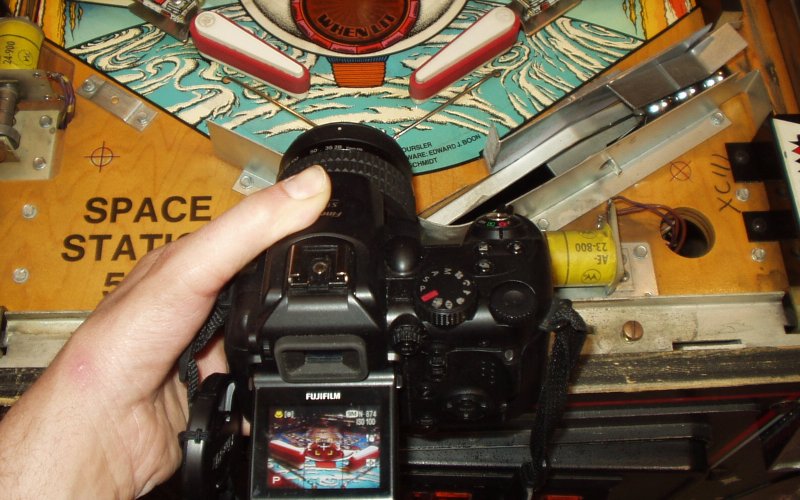
Tip: Use a business card or a small paper with black marker stripes to help your camera focus.
Some cameras have difficulty focussing at a specific part of a playfield (especially when there's not a lot of light).
Sometimes you just cannot see very clear on the lcd screen of your camera if focus and sharpness are where you want
it to be (especially on pinball shots this can be difficult to find).
Most cameras only focus at the center point which is not always what you want to focus on, but you don't always want
to recompose your composition.
In all these circumstances the best solution is to add something in the picture where your camera can easily focus on.
You can even
buy focus screen.
All digital cameras (as far as I know) let you half-press the shutter button, at that moment the camera will autofocus (default on what's in the center of the frame). Keep the card at the same distance of where you want to focus on, in the center of the viewfinder. Press the button so your camera focuses, remove card while keeping button half pressed, and take picture..
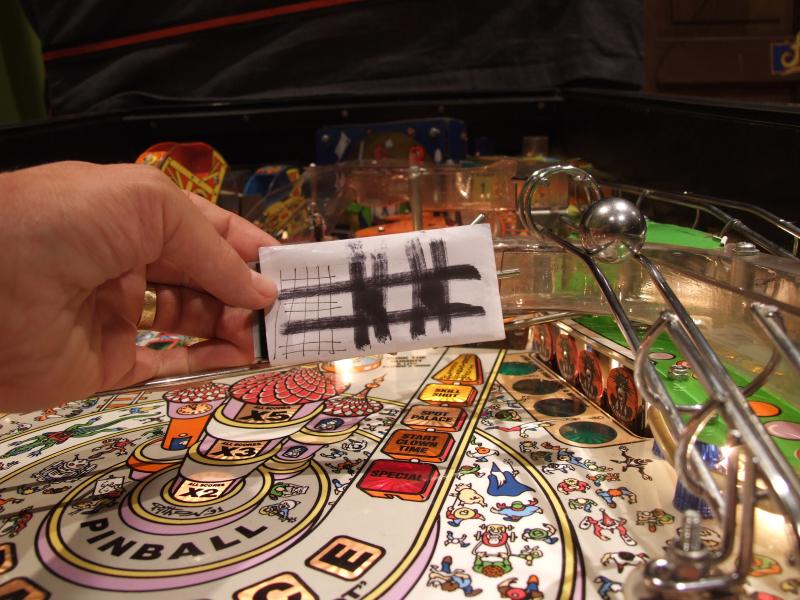
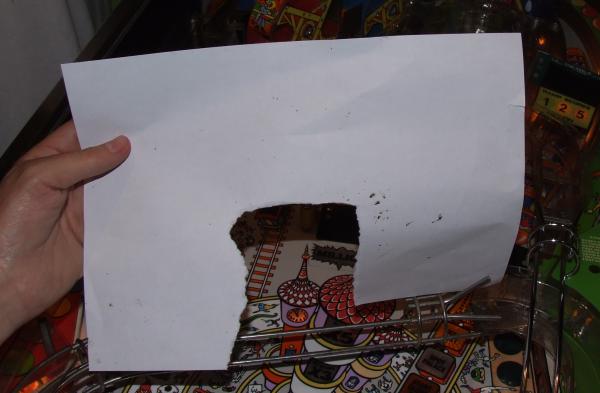
I wanted to have sharpness on the pinball on the right - but without having to move my camera as it's on a small tripod.
So I hold this paper in the center of the image at the same distance from the camera as the pinball. Because of the high contrast
(black lines on white paper) the camera has no problems focussing and I get sharpness at the distance where I want it to be.
Closeups with out-of-focus parts
Sometimes you want everything on the playfield to be in focus, sometimes you want the exact opposite.
If you have a dslr camera then you can adjust the aperture (set it to the smallest f-number possible).
On compact cameras you probably can't adjust this (portrait mode may work best). Although a compact camera can't physically ever
make the same kind of out-of-focus photo like a dslr can, there are some tricks to force a compact to get similar results.
Reduce the available light. Don't forget to use a tripod. Too much light forces the camera to use a small aperture.
Use (super) macro mode. Set your camera in macro mode, on almost every camera it's labelled as a flower.
The closer the object is where you focus on, the smaller the depth-of-field (DOF) becomes, so more will be out of focus.
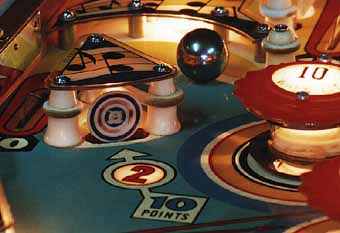
Focused at very short distance - only the immediate front (slingshot on the right) is sharp, background is unsharp.
Using flash with close-ups
Sometimes you can't invest time in a large light setup and just need to quickly take some pictures using the built-in flash of your camera. One problem you'll get is that the tiny flash is only effective at a very short range and will cause hard shadows. On a camera with a large lens, its own shadow may even be visible..
There is a trick however to change this behaviour (a bit) and make better looking pictures. Compare with the next photo. Shadows are much softer (look at the area behind the white standup target), the flash illuminates more of the playfield (see reflection in left ramp).
So, what is this magic tool ? Just a piece of white paper. I quickly tore a part off, just large enough so I could hold it over the lens of my camera. With a compact camera you want to make a small hole. Hold it in front of the camera. Experiment a bit with its position, maybe tilt it a bit forward at the top as it'll be more effectve as the distance between the paper and flash increases.
The flash fires against the paper which acts as a diffuser. Hard light is turned into soft light and the angle becomes much wider, so you can illuminate more on the playfield.
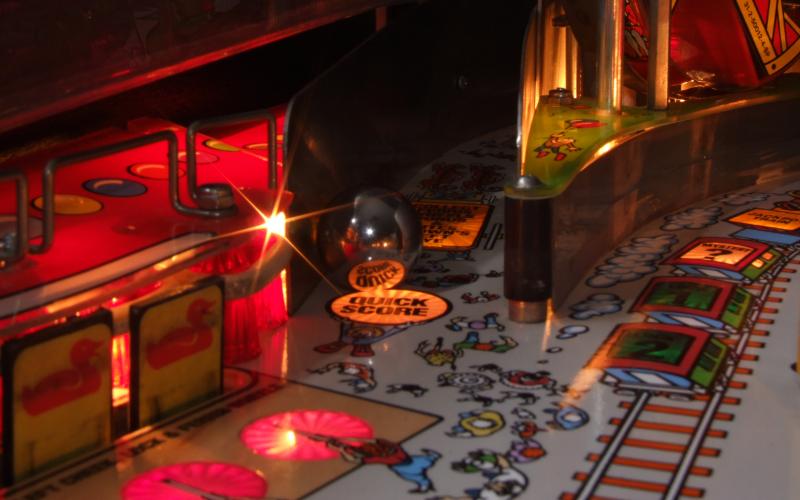
Long-shot details
If you have a camera with a good zoom lens, you can capture details from far away.
This shot was taken using a 300mm zoom lens set on a tripod approx 2.0m away from the subject - what is known commonly as a long-shot.
Aperture was set at f22 - and even so, the depth of field was very shallow - only enough to cover the ball and target.
The available light was a good mixture of daylight and fluorescent. Polarizing filter was used.
Delay timer was used to take the photo. Exposure time was 4 seconds. - Marco Rossignoli.
Having the camera faw away from the pinball machine means you can use your (built-in) flash as a source of light. Especially when using a small aperture, the flash effect is reduced so you want get hard shadows or large reflections. In this case flash can aid very well to fill in shadows or brighten up dull areas.